Showing posts with label dessert. Show all posts

Thursday, October 6, 2011

I should be reading for European History right now.

And yet, here I am.

I've missed you. Seriously. I've been so busy lately, and I haven't had the time to really cook anything. I'm so sad about that. But, anyway, I finally did it; I made my macarons. I feel like I've just been initiated into a whole new level of... foodiness. It feels awesome.


They don't look fancy, do they? That probably has something to do with the fact that I don't have a round piping tip. I had to just make it round as I piped the mixture on to the parchment. I tried.

I used a recipe I found on Tartelette. The original recipe was for blue chocolate-filled macarons. I didn't have any powdered food coloring, so I made white ones. I made two kinds of macarons--ones filled with bittersweet chocolate, and ones filled with orange curd. I was a little worried about the orange curd because my grandma (yes, she's here now) said that it wasn't sweet enough. But, I thought the meringue would be really sweet--and it is--so, I didn't change it. She thinks I did though. Shh.

French Macarons (from Tartelette)

3 egg whites
50 gr. granulated sugar
200 gr. powdered sugar
110 gr. ground almonds
2 Tb blue powdered food coloring

For the whites: the day before (24hrs), separate your eggs and store the whites at room temperature on a covered container. If you want to use 48hrs (or more) egg whites, you can store them in the fridge.
In a stand mixer fitted with the whisk attachment, whip the egg whites to a foam, gradually add the sugar until you obtain a glossy meringue. Do not overbeat your meringue or it will be too dry and your macarons won't work. Combine the ground almonds and powdered sugar in a food processor and give them a quick pulse. It will break the powdered sugar lumps and combine your almonds with it evenly. Add them to the meringue, give it a quick fold and remove some of the batter that will remain uncolored. Add 2 TB food coloring to the rest and fold the mass carefully until you obtain a batter that flows like magma or a thick ribbon.
Give quick strokes at first to break the mass and slow down. The whole process should not take more than 50 strokes. Test a small amount on a plate: if the tops flattens on its own you are good to go. If there is a small beak, give the batter a couple of turns. Do the same for the plain batter.s
Fill a pastry bag fitted with a plain tip with the batter and pipe small rounds (1.5 inches in diameter) onto parchment paper baking sheets.
With a toothpick dab dots of the plain batter and swirl.
Preheat the oven to 300F. Let the macarons sit out for an hour to harden their shells a bit and bake for 8-10 minutes, depending on their size. Let cool.
If you have trouble removing the shells, pour a couple of drops of water under the parchment paper while the sheet is still a bit warm and the macarons will lift up more easily do to the moisture. Don't let them sit there in it too long or they will become soggy. Pipe or spoon some ganache on one shell and sandwich with another one.

Chocolate Ganache

3/4 cup heavy cream
1 cup bittersweet chocolate

In a heavy saucepan set over medium heat, bring the heavy cream to a boil. Remove from the stove and add the chocolate to it. Let stand 2 minutes and then stir until fully combined. Let cool until firm enough to put in a small piping bag.


Don't you just love the gloss on perfectly whipped meringue?
I was really scared about messing up the meringue when I had to fold in the sugar and almond flour mixture. But, I  guess it did have to "deflate" a little and become a little liquid for this thing to work.


I did not mess up. Look at the cute little cookies! Look at them! Oh, and don't they have great feet? I was really afraid that they wouldn't come out looking like they did. Please give them that one hour to set before baking. It makes a difference; trust me.


I have to go back to being a student now. I have a quiz over the Thirty Years War tomorrow. Happy baking, everyone.

Monday, August 29, 2011

Because everyone needs study breaks

Hello there! It has been a while, hasn't it?
I've been really busy with homework, so I haven't had the chance to post anything new. I have been cooking though. I promise.

It was my art teacher's birthday last week.

So, I made him some orange bars. That's right. Orange bars. I was going to make some cupcakes, but some other girl beat me to it.  And, plus, who gets orange bars for their birthday? It was a safe bet.

I found this recipe on Sweet Tooth. What a cute little website. I love that she's a dental student, too.
Anyway, he loved the orange bars--as he should. They were tasty. Click here for the recipe.

So, let's get to the main attraction--crack pie. It's very aptly named. First of all, it is that good. Second of all, just like cocaine, this thing should be illegal.
This is one of those things that you should never make for yourself. The amount of calories in this thing is pretty hardcore. So, you'll most likely end up with a whole pie that you either a) eat all by yourself, or b) feel guilty about eating because you know what's in it. Neither of those are good. So, I think I made the right decision in making this once school has started. That way, I can give some of it away.

For those of you who has not been introduced to this pie yet, here's a brief rundown. The mad genius behind the crack pie is Christina Tosi, the pastry chef and owner of Momofuku Milk Bar in New York. She's a great lady. She just has to be.

The crack pie is very similar to a butter tart, but better. Unlike an ordinary butter tart, the crust for this pie is made from crumbled oatmeal cookies. So, as you're biting into it, you get the sticky and kind of gooey brown sugar and butter filling, and you also get a chewiness that comes from the oats. It's remarkable.

Momofuku Milk Bar's Crack Pie

Crust
9 tbs of room temperature butter
5 1/2 tbs of brown sugar
2 tbs of sugar
1 large egg
3/4 cup plus 2 tbs of old-fashioned oats
1/2 cup of flour
1/8 tsp of baking soda
1/8 tsp of baking powder
1/4 tsp of salt

Filling
3/4 cup of sugar
1/2 cup of brown sugar
1 tbs of non-fat milk powder
1/4 tsp of salt
1/2 cup of butter, melted
6 1/2 tbs of heavy whipping cream
4 large egg yolks
1 tsp of vanilla

  1. Preheat your oven to 350 degrees Fahrenheit. Line a medium sized baking sheet with parchment paper.
  2. Beat 6 tbs of butter with 4 tbs of brown sugar and 2 tbs of sugar in a medium bowl until fluffy. Add egg and beat until the mixture turns pale. Add oats, flour, baking powder, baking soda, and salt. Mix until everything is nicely combined.
  3. Turn the mixture out on to the prepared baking sheet. Spread out the dough until it comes close to the edges of the pan, and bake for 17 to 18 minutes. Cool on a rack.
  4. Using your hands, crumble the giant oatmeal cookie into a large bowl. Add the leftover butter and brown sugar, and mix with your hands until the mixture is moist enough to stick together.
  5. Transfer the mixture into a 9 inch pie dish and press it evenly on to bottom and up the sides of the dish. Place the dish on a baking sheet.
  6. For the filling, Whisk both sugars, milk powder and salt in a medium bowl. Add melted butter and whisk until combined. Add cream, egg yolks, and vanilla. Whisk until you get a smooth mixture, and pour it into the crust.
  7. Position rack in the center of your oven. Bake the pie for 30 minutes at 350 degrees. Reduce oven temperature to 325 degrees Fahrenheit. Bake for another 15 to 20 minutes, or just until the filling is set around the edges but still moves slightly in the center when the pie dish is gently shaken.
  8. Cool the pie for 2 hours on a rack. Chill uncovered overnight.
Yes, you have to wait until the next day to eat this thing. It's well worth it, though.


I was right about this pie being calorie ridden, right? I still can't believe how much butter and sugar went into this thing. Oh, and cream. The cream!


I love that. Don't you? The way the cream kind of makes this rich, white cloud in the brown sugary mixture. I live for that--which is kind of glorious, don't you think? No? Oh. Okay.


The original recipe said that a little bit of bubbles are okay, so I didn't worry too much over them. Plus, I was going to put powdered sugar all over the top anyway.


I've been getting rave reviews from everyone. So, try it for yourself and let me know how it goes. Happy baking! :)

Monday, August 8, 2011

Back to life, back to reality...

You know that song, right? The one by Soul II Soul?
Is it stuck in your head now? Good. School's starting on Monday.

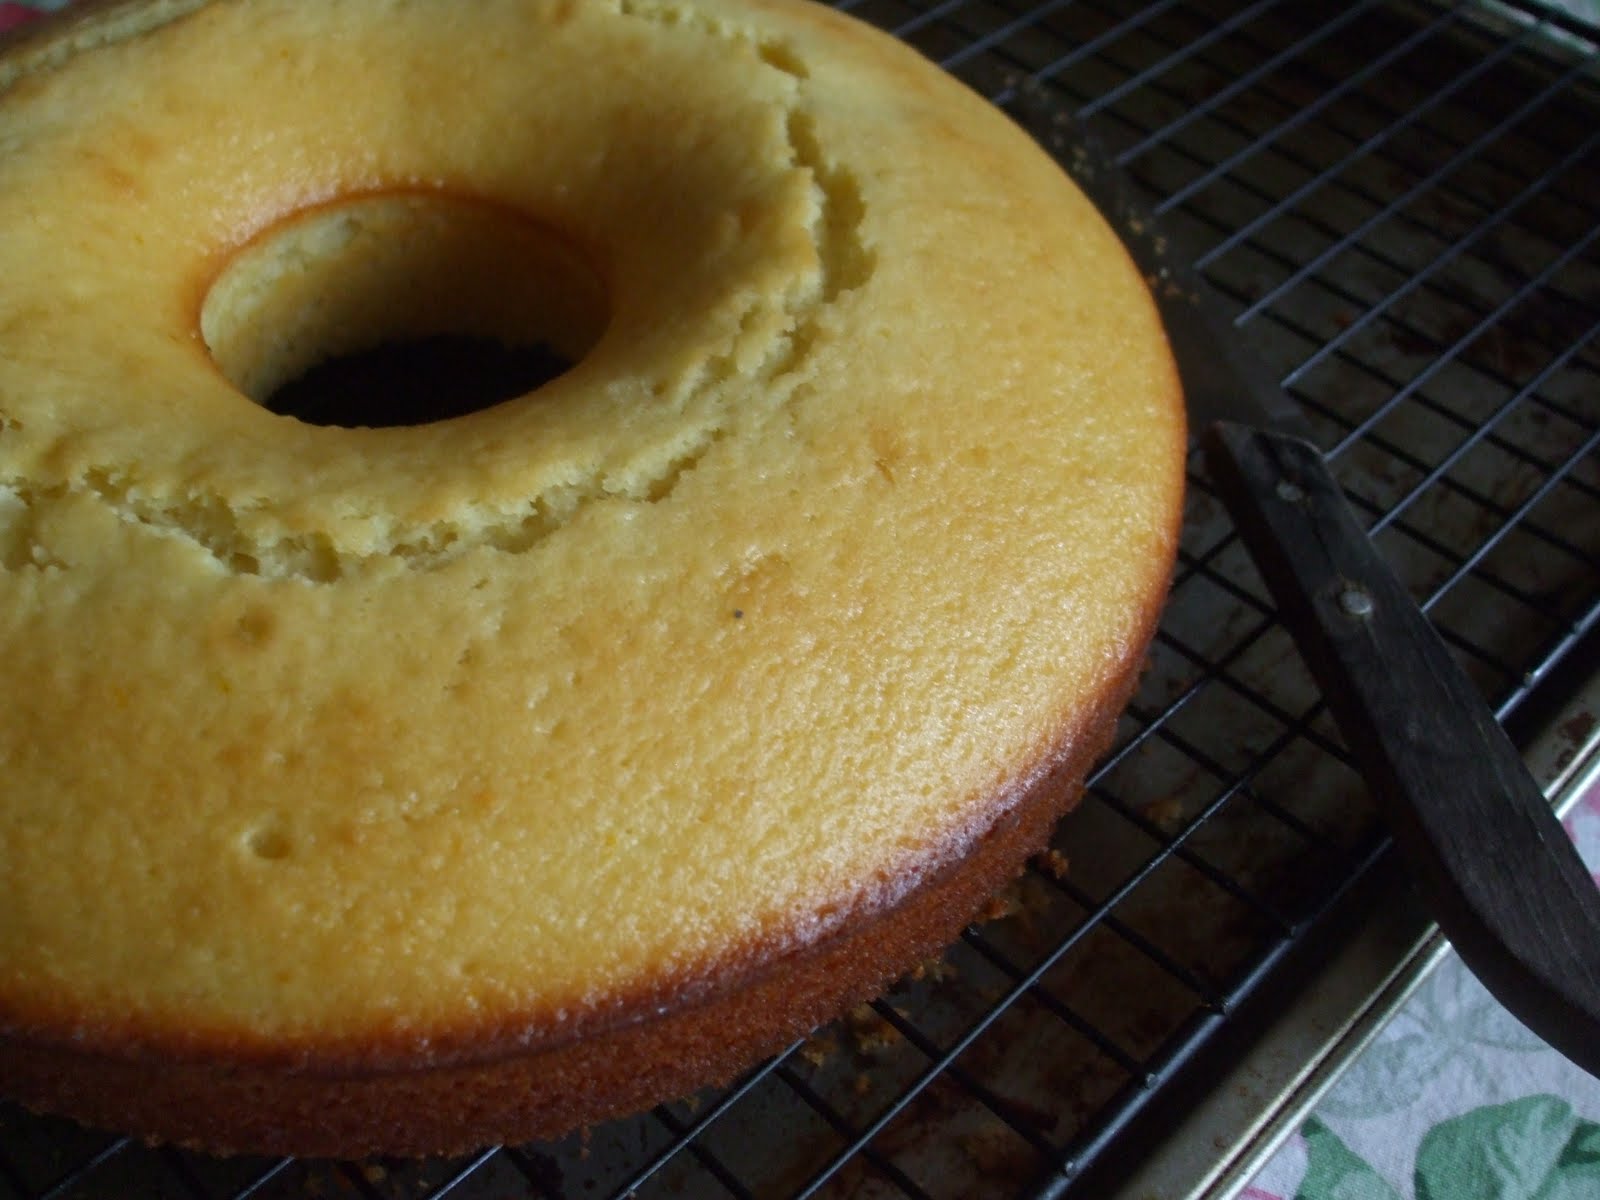
I had a hankering for cake. Not like the gooey, super rich, slathered-in-icing type of cake, though. I wanted a simple cake. Nothing fussy. I wanted something my grandmother or my mother would make. Rich, but not too sweet. I found a recipe at Bon Appetit for a yogurt pound cake. It sounded awesome.

I honestly didn't expect on making a post out of this. I wanted cake, and so did my uncle. I was just going to make it, and eat it together tonight. I didn't even take any pictures before I baked the cake.
But, as I was making it, it reminded me so much of the yellow cake my mother would make. My grandmother made the recipe, I think. My mother came from a low-middle class family, and sometimes, they just didn't have a lot of money lying around come the children's birthdays. So, my grandmother would bake their cakes, and my grandfather would go out and buy them something nice.
It's lovely that something so great came out of fairly difficult times. I think that's why it's so beautiful in the first place.

Yogurt Cake with Honey Glaze (adapted from bon appetit)

1 1/2 cups of flour
2 tsp of baking powder
1/4 tsp of salt
1 cup of plain yogurt
1 scant cup of sugar
3 large eggs
1 tsp of orange zest
1/4 tsp of vanilla extract
1/2 cup of vegetable oil
about 3 tbs of honey
1 tsp of water

  1. Position a rack in the center of your oven and preheat to 350 degrees Fahrenheit. Generously butter an 8 1/2 inch loaf pan, or a bundt pan. Or, you can just use an angel food cake pan like I did.
  2. Into a bowl, sift flour, salt, and baking powder. In a large mixing bowl, combine eggs, sugar, yogurt, orange zest, and vanilla. You can use a whisk, but I used a hand mixer to speed up the process.
  3. Then, gradually whisk in the dry ingredients. I didn't dare use a mixer for this part. I tend to over-mix my batter sometimes.
  4. Fold in the oil using a spatula. Then, transfer the batter on to the prepared pan, and place the pan on a baking sheet. Bake for about 40 minutes, or until a toothpick comes out clean. 
  5. For the glaze, put the honey and water in a microwave safe bowl, and pop it in the microwave for about 20 seconds. After the cake is done baking, put it on a cooling rack, and brush the hot glaze over it. Let the glaze cool and set before cutting.

The smell of orange and vanilla wafted out of the oven. It was nice. Do let the glaze set properly. If you don't, you'll end up with a nice pound cake with a soggy crust. If you do, you should have a sticky, slightly crunchy crust around the soft, spongy cake.


Happy baking.

Thursday, June 23, 2011

Raspberry Pavlova

Okay, this was my first crack at making meringue. And, as I expected, my meringue kind of failed. I remember watching Barefoot Contessa (you know, the one with Ina Garten--not the Bogart movie) and just drooling over the berry pavlova she made. And, she made it look so effortless. I'm sorry, but damn that Ina!

Whipping up the actual thing was pretty easy and not at all labor intensive since I have a giant stand mixer. But, baking the sucker was tricky. I followed the recipe I found here. And, well, you'll see.


My meringue browned and cracked! The temperature was too hot. The center was all marshmallow-y, but the outer part sort of separated from the inside, and got all crackly and crisp. I've eaten meringue before, so I know that crispy is good. But, this was not good crispy.
I didn't use Ina's recipe (found here) because I saw the reviews and got all skeptical. I saw that the meringue was to be baked at 180 degrees Fahrenheit for this recipe and thought it was too low. Well, I guess I was wrong. Forgive me, Ina. Who did I think I was to ever doubt you?
Anyway, the pavlova itself turned out semi-pretty because I lathered it with barely sweet whipped cream to cover up the bad spots. I mean, I have to say--the taste wasn't bad. Other than the crackly "crust" and chewy edges that is. Fear not, though. I'm not giving up on this thing. I'll make the perfect meringue sooner or later. I'm still young. Here's the recipe I used with modifications.

Pavlova

4 egg whites
1 cup of sugar (don't reduce it. the ratio of sugar to egg white is supposed to be 1/4 cups : 1 egg white)
1 tsp vanilla extract
1 tsp lemon juice or vinegar
2 tsp cornstarch
1 pint of heavy cream
1 tbs sugar
about 1 tsp of vanilla (I eyeballed it using the cap)
Any fruit you want

  1. Preheat the oven to 250 degrees Fahrenheit (the original recipe said to preheat the oven to 300 degrees. Please don't do that). Line a baking sheet with parchment paper, and draw a 9 inch circle on it. Turn it over. We don't want a pencil mark on our meringue!
  2. For the meringue, whisk the egg whites on high for about 3 to 4 minutes, or until soft peaks form. Add the sugar slowly under medium speed. 
  3. Turn your mixer up on high and continue beating it for 5 to 6 more minutes, or until it's glossy. Turn your mixer way down, and just stir in the vanilla, lemon juice and cornstarch. Do not overbeat.
  4. Spread the egg white mixture on your baking sheet while staying inside the 9 inch circle. I would recommend using the good sized baking sheet because this thing grows. Bake it for about 1 hour. Do not open the oven door during baking. That's how you get jacked up meringue.
  5. After the meringue is done, turn off your oven and let it rest inside the oven for at least 2 hours with the door just cracked open. This is how you get a nice, dry meringue.
  6. For the whipped cream, whip the heavy cream until it starts to thicken. Add the 1 tbs of sugar and the vanilla. This makes a barely sweet whipped cream, which was perfect since the meringue is sweet enough.
  7. After the drying period, slather your meringue with the whipped cream and top with your choice of fruit. As you can see, I chose raspberries.
I hope you have a better luck with this than I did. Tell me how you do if you decide to make this. Happy baking!

Monday, June 20, 2011

Choux a la Creme

Cream puffs. Growing up, my mom made this really often, and her cream puffs are absolutely delicious. It was kind of daunting trying to make her cream puffs. And, sure enough, my cream puffs weren't top notch.

I messed up on the dough. It was all crumbly, but I was able to put it together and spoon it on the baking sheet. I think I didn't have enough egg whites in it. The pastry cream recipe, I think, called for way too much cornstarch. The taste was great, but the textures of the pastry and the cream were not satisfactory.

As I said in an earlier post, I do not have my camera right now. So, you'll just have to believe me when I say that I made a way better batch of cream puffs yesterday. I didn't use my mom's recipe at all. Here's the good recipe.

Choux a la Creme


Pate a Choux (recipe courtesy of Anne Burrell. Find it here)
1/2 cup of water
1/2 stick of butter
a pinch of salt
1/2 cup of all-purpose flour
2 eggs


Pastry cream (original recipe here)
2 cups of milk
1/4 cup of sugar
2 egg yolks
1 egg
1/4 cup of cornstarch
1/4 cup of sugar (originally called for 1/3 cup, but I reduced it)
2 tbs of butter
1 tsp of vanilla extract
  1. To make the pastry cream, bring the milk and 1/4 cup of sugar to a boil over medium heat.
  2. In a bowl, use a hand mixer to whisk the egg yolks and egg. Add the cornstarch and the remaining sugar, and mix until the mixture is smooth and pale in color.
  3. When the milk comes to a boil, drizzle into the egg mixture slowly so that you don't cook the eggs. Use a whisk for this process. Put the mixture back in the pan and slowly bring to a boil while continuously stirring.
  4. When the mixture thickens, remove from heat and stir in the butter and vanilla. Pour into a heatproof container and put a piece of plastic wrap directly on the surface of the custard to prevent a skin from forming. Put it in the a fridge for at least an hour.
  5. Preheat your oven to 425 degrees Fahrenheit. Line a baking sheet with parchment paper.
  6. To make the dough, put water, butter and salt in a pot and heat until the butter melts completely.
  7. Add the flour all at once and stir until the dough forms a ball. Dump into a bowl and let it sit for a couple of minutes before incorporating the eggs.
  8. After a couple of minutes, mix in the eggs one at a time using a mixer to ensure that the dough is evenly combined. You should end up with a pasty, sticky dough.
  9. You can either use a pastry bag or a Ziploc bag to pipe the dough on to the baking sheet. Or, you can do what I did, and just spoon it on. Whatever you do, leave at least one inch between each puffs. They grow! Bake for 20-25 minutes.
  10. After both the pastry cream and the pastries are cool, cut the pastries horizontally and fill away.
The pastry was light and it puffed up really well. The pastry cream was just the right consistency, and the recipe actually makes twice the amount you'll need to fill the profiteroles. So, I'm making some fruit tarts tomorrow (inspired by La Cuisine d'Helene's Parisian Fruit Tarts).